|
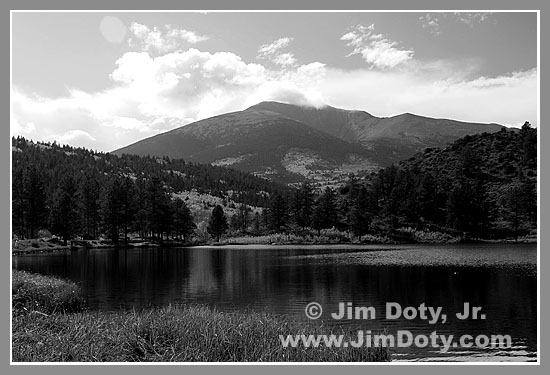
O'Haver Lake and Mt. Ouray (Colorado) in Black and White Infrared black and white
photography has a different look than regular black and white photography. Compare the two images above. The second image is a straight forward black and white image which was converted from the color image at the end of this
article.
Subjects that emit infrared light are recorded as white or light tones and subjects that emit very little or none are recorded as black or dark tones. In infrared light, blue skys look very dark and vegetation
records as light to very light tones. In straight black and white photography, blue skys and vegetation record as shades of gray unless some kind of filtration is used.
To do infrared photography with a Canon 10D or Canon
20D camera (or one of the other digital cameras that can do this), use a Hoya R72 infrared filter. These are expensive (around $275 in a 77mm size). Set the camera on a tripod, compose, and focus before you put the filter on the
lens. The filter is so dark that you won't be able to see through the viewfinder. Exposures are long. On a bright, sunny day, start with ISO 100, f/8 and 30 seconds and bracket exposures from 15 seconds to 1 minute.
The
resulting image will be red on the LCD viewing screen. Transfer the image to your computer, use Photoshop, Photoshop Elements, or some other image editing software to remove the red caste (desaturate the image). Then use "levels"
to tweak the contrast. If you did everything right and picked a good subject, you now have a dramatic, black and white infrared image!
Do a search on the internet to see if you can do digital infrared photography with your
camera. If you can, digital black and white infrared photography is a lot less fuss and bother than infrared film. With infrared film, you had to take a lot of extra precautions which included opening the film canister, loading and
unloading the camera, and putting the film back in the cannister, all in absolute darkness. Ah, the good old days. |