|
FILTERS FOR FALL
Remember that a good polarizing filter
can darken blue skys and remove the glare from vegetation. My first choice in brands and type (and very expensive) is the Singh-Ray warm-polarizer. My second choice is a Tiffen polarizer or warm polarizer. Check your camera manual to see if you need the more expensive circular version. If not, save some money and buy the linear version.
A warming filter helps on cloudy days. My first choice is the Tiffen 812. My second choice is the Hoya 81B. They are pretty close in color and either will do a fine job.
A
Tiffen Enhancing filter or a Hoya Intensifier filter
can do wonderful things with the red and orange colors of fall (either brand is fine). If you don't have one and want one, order now before the stores sell out (like they have the last three years in the fall). I don't like to use this filter if there is a lot of green in the scene as it makes the green colors look unnatural. Save it for scenes with mostly reds and oranges.
A Cokin yellow/blue polarizer #173 is also useful for fall photography in certain situations. It either looks great or terrible. Use it wisely.
If you are shooting reflections, and the
reflection is two stops darker than the subject, use a "split neutral density" or "graduated gray"
filter. Position the filter so the gray or "neutral density" area of the filter darkens the top of the image to match the reflection. My first choice is a Singh-Ray
two-stop, hard-edge filter made to fit in a Cokin P filter holder. My second choice is a Tiffen
glass two-stop filter made to fit in a Cokin P filter holder. Both of these filters are upwards of $100. Not cheap but worth it.
FILMS FOR FALL
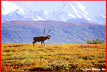
I tried several kinds of film on the red and orange tundra in Alaska, plus glaciers and blue sky. The colors from Fuji Provia 100F
looked good, but not as vibrant as I wanted. Despite everyone raving about this film (it is amazingly sharp and grainless) it is not my first choice.
Kodak E100VS
gave me great colors on the Alaska tundra. Though a tad less sharp and more grainy than Provia 100F, this is a great film. When I got back tests of these two films, I ended up ordering more E100VS in mid trip so I wouldn't run out.
Fuji Velvia
still is a wonderful landscape film, probably the best! Rate this film at a speed of 40 (not 50). The colors were as rich and saturated as E100VS, but slightly different in palette. I would have used more Velvia than I did, but I needed the speed of E100VS for shooting animals against the tundra in low light. When animals in low light or wind aren't a consideration, put your camera on a tripod and use this glorious film.
I planned on Velvia and E100VS for landscapes and Kodak E100SW
for wildlife. I actually used more E100VS for wildlife than I planned due to the tundra colors. I am glad I did. While E100SW is still a very fine film (and I certainly prefer it to Provia 100F), I found I usually prefered the results with E100VS. This was a surprise. It means I can use E100Vs for almost any kind of outdoor photography.
For really low light with wildlife I used Kodak E200
rated at 320 (with push 1 processing), or rated at 640 (with push 2 processing). If you don't understand push processing, go to the article on FILM.
I also used Fuji MS 100/1000
rated at 320 (push 2 stops) with good results. This is a good film but I have a slight preference for E200.
The E200 pushed was great for shooting the Northern Lights.
Summary: Fuji Velvia and Kodak E100Vs are best for fall colors. E100VS is also great for wildlife. You can
substitute the amateur version of E100VS: Kodak Elite Chrome 100 Extra Color.
Second choice is Kodak E100SW or the amateur version, Kodak Elite Chrome 100.
For low light and moving subjects: E200 pushed.
Fall color print film: Fuji Superia Reala.
COMPOSITION
Work with edges: sky against hillside, hillside and valley, trees and water, sky and water, one color against another (red maple leaves against green evergreens). Don't
center the horizon except for some reflection photos. Remember the "rule of thirds" - use it if appropriate.
If the sky is gray, omit it entirely, or at least don't show very much sky. Light
overcast days make for great colors in intimate landscapes (omit the sky). You can get great colors right after a rain when leaves are wet. Use a polarizer.
Try closeups of colorful leaves and
berries. Look for outrageous colors.
Simplify. More photos suffer from having too much in the frame than too little. Less is often more.
EXPOSURE:
Remember: "Add light to make light." Take away about 1/2 to 1 stop of light from dark
green evergreens. Add 1/2 to 1 stop of light to pale yellow willow leaves. Shoot red and orange maple leaves pretty close to what the camera meter says (plus or minus 1/2 stop).
Bracket exposures in
complex lighting situations. My brother in law, after getting back some of his shots from Alaska, said "Tell your students to bracket even more than you have been telling them to bracket." Amen to
that. My snow covered McKinley shots looked best at less exposure than I would usually shoot a Michgan snow scene. Wide bracketing saved me in sunrise and sunset situations.For more information, see
Color Films Lite, Color Film,
Filters Lite, and Exposure
. |